

Need something in a hurry? Head over to the Sloth Summary of this article for property filtering and prettification commands!
Information Overload
Docker is amazing at providing verbose information to accompany any given command. However, sometimes we are debugging a very specific issue that needs our attention quickly and we don’t have all day to scroll through a long list of irrelevant data.
This tutorial will explore ways that we can filter and format the output of Docker commands to be concise and most importantly, pretty.
The –format option
Run the following command (replacing <your container id> with your container’s id) for any container that you currently have running.
docker inspect <your container id>
Wow. That’s a lot of output, right?!
This information is great at helping you to gain very specific insights of your running container, but rarely would you need all of this information in one go.
If you pay attention to the Docker documentation for any given command, you’ll notice that they support an option called format.
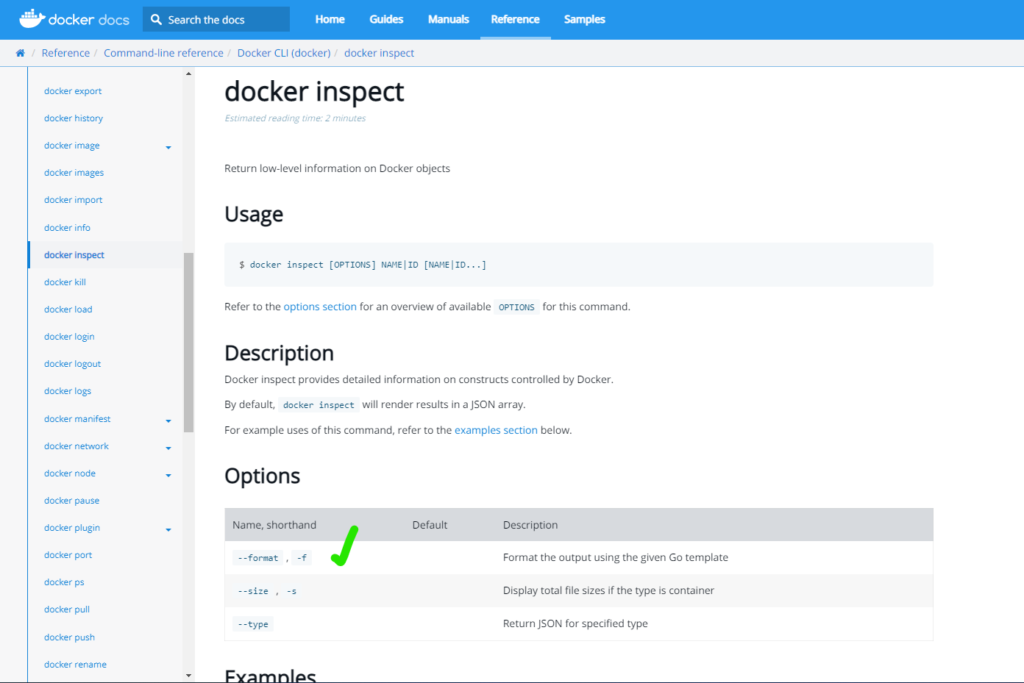
The format option allows you to specify a Go template to extract specific values or sections of a given CLI output.
For example, we can extract the Networks that a running container belongs to by running the following command.
PS C:\Users\TJ> docker inspect --format='{{.NetworkSettings.Networks}}' <your container id>
The --format command allows us to specify a Go template for fetching fields in the response structure. In the example above .NetworkSettings.Networks drills into the CLI output from the topmost property (NetworkSettings), and then into its child (Networks).
This command isn’t enough to provide us with value just yet, though. This is because we are trying to observe a complex object. Don’t be surprised if you see an underwhelming output like this:
map[bridge:0xc0006fa000]
Luckily, the go template can be told the format that we’d like the output to be rendered as. If we add json at the beginning of the template, we’ll get something much more useful.
PS C:\Users\TJ> docker inspect --format='{{.NetworkSettings.Networks}}' <your container id>
In my case, when inspecting a container running Cerebro, this is the output that I receive.
{"bridge":{"IPAMConfig":null,"Links":null,"Aliases":null,"NetworkID":"ca82fdd00d4515c6e5dd200e036564042698fc89e1faaeb1374114debec6283b","EndpointID":"c56867becabf9defe69f8defc404ac620b93521749f6493e24bd686fa35f9492","Gateway":"172.17.0.1","IPAddress":"172.17.0.2","IPPrefixLen":16,"IPv6Gateway":"","GlobalIPv6Address":"","GlobalIPv6PrefixLen":0,"MacAddress":"02:42:ac:11:00:02","DriverOpts":null}}
This is more useful that what we previously saw, but it’s pretty gross isn’t it? If only we could make it more kawaii…
Pretty-fication of Docker Json Output
Docker and Go templates are unfortunately only able to get us so far. While the output that we saw above contains the details that we require it’s not easy to navigate. I’d hazard a guess that watching paint dry would be more interesting than wasting time reading through the entire flat json object until you find the field that you required.
According to this GitHub issue thaJeztah confirms in a comment that omitting Json formatting from Docker command pipelines was a design decision, given that many other great library options existed already. Why re-invent the wheel, right? A true Code Sloth if I ever did see one!
This unfortunately means that we need to install a few more things in order to make our json output pretty (formatted).
Installing Chocolatey
Chocolatey is a great tool to have in your toolkit for quickly installing dependencies. Head over to the installation page and follow the instructions to get it installed.
This step is optional however, and Jq can be installed via Windows native binaries if you’d prefer.
Installing Jq
Jq is a great tool that allows you to manipulate and format json objects. To get started, head over to the Jq installation page and run the chocolatey command (if using Chocolatey), or download the Windows binaries.
Once installed, using Jq to format the output of Docker commands is as simple as piping the output to Jq itself.
PS C:\Users\TJ> docker inspect --format='{{json .NetworkSettings.Networks}}' cerebro | jq
{
  "bridge": {
    "IPAMConfig": null,
    "Links": null,
    "Aliases": null,
    "NetworkID": "ca82fdd00d4515c6e5dd200e036564042698fc89e1faaeb1374114debec6283b",
    "EndpointID": "c56867becabf9defe69f8defc404ac620b93521749f6493e24bd686fa35f9492",
    "Gateway": "172.17.0.1",
    "IPAddress": "172.17.0.2",
    "IPPrefixLen": 16,
    "IPv6Gateway": "",
    "GlobalIPv6Address": "",
    "GlobalIPv6PrefixLen": 0,
    "MacAddress": "02:42:ac:11:00:02",
    "DriverOpts": null
  }
}
*Sheds a tear*. Is there anything more beautiful than readable JSON content?
Spoiled for Choice: pure Jq v.s. –format
If you headed over to the Jq tutorial page you’ll notice that it is more than just a tool for prettyifying json objects. It can actually be used to extract fields from json objects too!
But wait. Docker commands output their results as Json in the first place… That’s right! We can pipe the output of Docker commands straight into Jq and use it for property filtering and formatting.
Let’s take a look at how we pull out the same Networks object from our inspect command using Jq.
PS C:\Users\TJ> docker inspect cerebro | jq '.[0].NetworkSettings.Networks'
{
  "bridge": {
    "IPAMConfig": null,
    "Links": null,
    "Aliases": null,
    "NetworkID": "ca82fdd00d4515c6e5dd200e036564042698fc89e1faaeb1374114debec6283b",
    "EndpointID": "c56867becabf9defe69f8defc404ac620b93521749f6493e24bd686fa35f9492",
    "Gateway": "172.17.0.1",
    "IPAddress": "172.17.0.2",
    "IPPrefixLen": 16,
    "IPv6Gateway": "",
    "GlobalIPv6Address": "",
    "GlobalIPv6PrefixLen": 0,
    "MacAddress": "02:42:ac:11:00:02",
    "DriverOpts": null
  }
}
At this point we are spoiled for choice. Do we use Jq for response filtering, or Go templates?
Personally, I think that using Jq for property filtering in simple queries is a more concise syntax. Fewer keys typed when debugging an issue is always a win in my book!
Filtering Non JSON Based Docker Output
Dealing with a huge blob of JSON data doesn’t conclude our journey towards concise Docker command line output. The above strategies work great on JSON based output, but what happens if we are given a long list of data instead of a blob?
An example might be inspecting the current images that you have locally in Docker.
docker image ls
You might argue that we can JSON format the output and then filter it from there, but what true Code Sloth has that much energy?
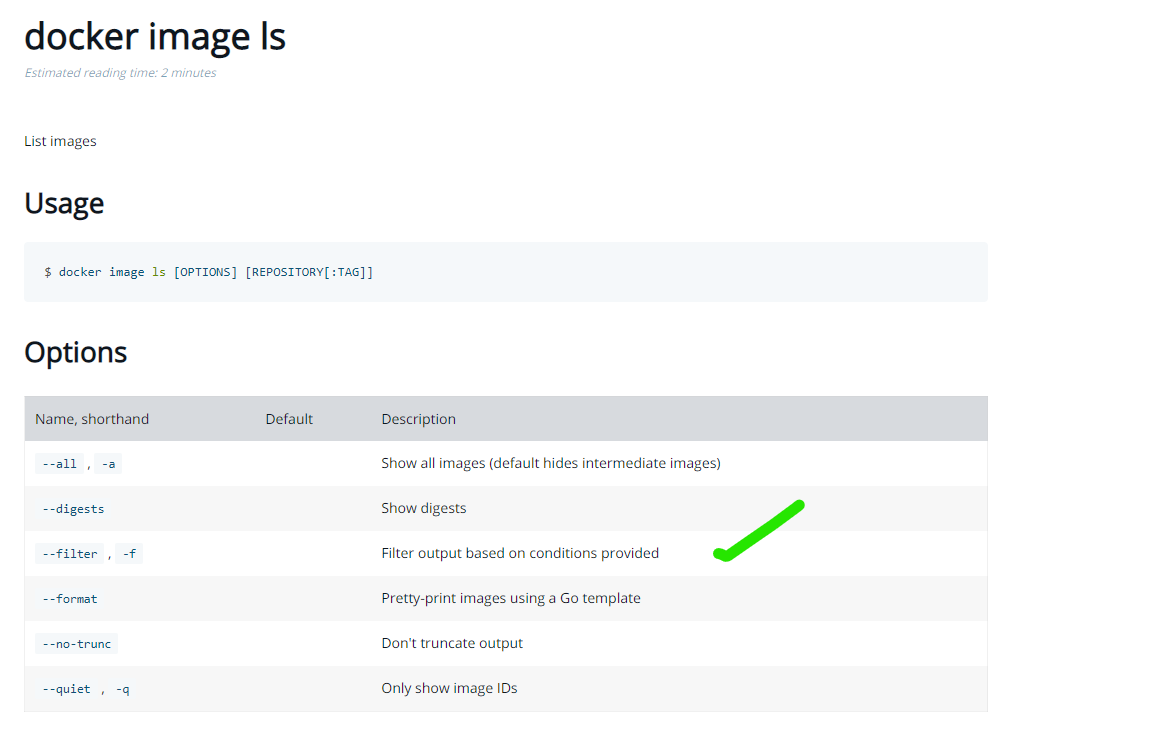
Commands that don’t output JSON data will have a –filter parameter in their Docker documentation, such as docker image ls, as seen below.
Let’s pretend that you’re currently working on building a new multi-stage image (such as the one from this Code Sloth tutorial). You decide that you want to find the ID of your image after having given it a well known tag.
Instead of scrolling endlessly through the growing list of all images on your console, you can use this option to filter out the required image by its name/tag.
docker image ls --filter=reference=<your image tag>
The reference parameter is discussed here in the page on images, but ultimately allows us to return only those images that match what has been specified. Other types of filters include:
- Filtering for dangling images
- Filtering for images created after a certain date
- Filtering for images created before a certain date
Getting the Whole Story
In the article so far we have talked about how we can reduce the visible output from Docker. However, there may be times when we actually want to see more.
Take the following history command and its output as an example:
PS C:\_dev\CodeSloth\multi project docker debugging\DebuggingMultipleProjectsInDocker> docker history test-images
IMAGE          CREATED          CREATED BY                                      SIZE      COMMENT
fde853379892   17 minutes ago   ENTRYPOINT ["dotnet" "RedisReader.dll"]         0B        buildkit.dockerfile.v0
<missing>      17 minutes ago   COPY /app/publish . # buildkit                  7.93MB    buildkit.dockerfile.v0
<missing>      28 minutes ago   WORKDIR /app                                    0B        buildkit.dockerfile.v0
<missing>      41 minutes ago   WORKDIR /app                                    0B        buildkit.dockerfile.v0
<missing>      6 days ago       /bin/sh -c ln -s /usr/share/dotnet/dotnet /u…   24B
<missing>      6 days ago       /bin/sh -c #(nop) COPY dir:2ececaaf1e3c9e8c7…   70.6MB
<missing>      6 days ago       /bin/sh -c #(nop)  ENV DOTNET_VERSION=6.0.9     0B
<missing>      6 days ago       /bin/sh -c #(nop)  ENV ASPNETCORE_URLS=http:…   0B
<missing>      6 days ago       /bin/sh -c apt-get update     && apt-get ins…   37MB
<missing>      7 days ago       /bin/sh -c #(nop)  CMD ["bash"]                 0B
<missing>      7 days ago       /bin/sh -c #(nop) ADD file:5bd53bff884e470b3…   80.5MB
If we are trying to understand the context of the CREATED BY column, seeing truncated output is of no help.
In this case, we can provide the --no-trunc parameter to tell Docker not to truncate the output. This will resolve to the following:
PS C:\_dev\CodeSloth\multi project docker debugging\DebuggingMultipleProjectsInDocker> docker history test-images --no-trunc
IMAGE                                                                     CREATED          CREATED BY
                                                                                                                                                       SIZE      COMMENT
sha256:fde85337989295dd139b558367e2ea6e93128a01acf6f6b60a897d53bcba4daf   22 minutes ago   ENTRYPOINT ["dotnet" "RedisReader.dll"]
                                                                                                                                                       0B        buildkit.dockerfile.v0
<missing>                                                                 22 minutes ago   COPY /app/publish . # buildkit
                                                                                                                                                       7.93MB    buildkit.dockerfile.v0
<missing>                                                                 33 minutes ago   WORKDIR /app
                                                                                                                                                       0B        buildkit.dockerfile.v0
<missing>                                                                 46 minutes ago   WORKDIR /app
                                                                                                                                                       0B        buildkit.dockerfile.v0
<missing>                                                                 6 days ago       /bin/sh -c ln -s /usr/share/dotnet/dotnet /usr/bin/dotnet
                                                                                                                                                       24B
<missing>                                                                 6 days ago       /bin/sh -c #(nop) COPY dir:2ececaaf1e3c9e8c75501e76e94981fbe9719e8042f7f348418fb3214cebea86 in /usr/share/dotnet                                                                                                                                                             70.6MB
<missing>                                                                 6 days ago       /bin/sh -c #(nop)  ENV DOTNET_VERSION=6.0.9
                                                                                                                                                       0B
<missing>                                                                 6 days ago       /bin/sh -c #(nop)  ENV ASPNETCORE_URLS=http://+:80 DOTNET_RUNNING_IN_CONTAINER=true
                                                                                                                                                       0B
<missing>                                                                 6 days ago       /bin/sh -c apt-get update     && apt-get install -y --no-install-recommends         ca-certificates                 libc6         libgcc1         libgssapi-krb5-2         libicu67         libssl1.1         libstdc++6         zlib1g     && rm -rf /var/lib/apt/lists/*   37MB
<missing>                                                                 7 days ago       /bin/sh -c #(nop)  CMD ["bash"]
                                                                                                                                                       0B
<missing>                                                                 7 days ago       /bin/sh -c #(nop) ADD file:5bd53bff884e470b3c12425132975ab9c6f99002c62c43bca1ff5cde9d863b92 in /
                                                                                                                                                       80.5MB
Much better! Now we can see the entirety of the output which allows further exploration.
Sloth Summary
To get nicely filtered and formatted Docker JSON output
Docker property filtering with Jq prettification:
docker inspect --format='{{json .NetworkSettings.Networks}}' <id> | jq
Jq property filtering and prettification:
docker inspect <id> | jq '.[0].NetworkSettings.Networks'
To get nicely filtered list based Docker output
Use the –filter parameter in commands such as
docker image ls --filter=reference=<your image tag>