This Docker networking tutorial will provide you with the knowledge to have applications communicate between two Docker containers. Don’t forget to check out the Sloth Summary at the end of the post for a list of important Docker networking commands that you can run!
Docker Networking Tutorial
When starting your Docker journey it can be a little confusing to understand how to “get into” a container, or if things such as web requests can “get out” of one. This confusion then compounds when you start running multiple Docker containers whose internal services need to communicate with each other.
This article will explore how container networking works, acting as an extension to the connecting to OpenSearch tutorial. We’ll make reference to running Cerebro and OpenSearch images in the coming commands, but feel free to use whatever image names and ports relate to your personal circumstances.
A wise Code Sloth removes all unnecessary barriers to their learning journey!
This is a practical tutorial article. Therefore it is not a deep dive into the details of how Docker networking fundamentally interacts with an underlying Operating System, or every available network driver. Rather, step by step we’ll cover the building blocks of networking until we culminate the gained knowledge into a breakdown of the command that was used to connect Cerebro to OpenSearch.
Network Drivers
When you first read the term network driver your mind might instantly jump to the often maligned hardware drivers that you install on your computer, or a complex series of hardware cables connecting servers together.
Don’t worry! Docker network drivers are not the same thing.
Think of network drivers as a configuration setting for your Docker container. Given that Docker networking is “pluggable”, you’re simply able to specify the name of your desired driver and the container will happily communicate using it.
To begin our network driver journey, let’s start by running a command in a PowerShell terminal:
docker network ls
This command will list all of the Docker networks that are running on your machine. If you’re starting out, you’ll likely just see the default bridge network, as below. This network is created and named “bridge” by default when you start Docker.
NETWORK ID     NAME                        DRIVER    SCOPE
ca82fdd00d45   bridge                      bridge    local
The Bridge Network Driver: an Undesirable Default
If no network driver is specified when a Docker container is run, it will join the default bridge network.
Let’s observe this by starting a container that is running Cerebro:
docker run --name cerebro lmenezes/cerebro
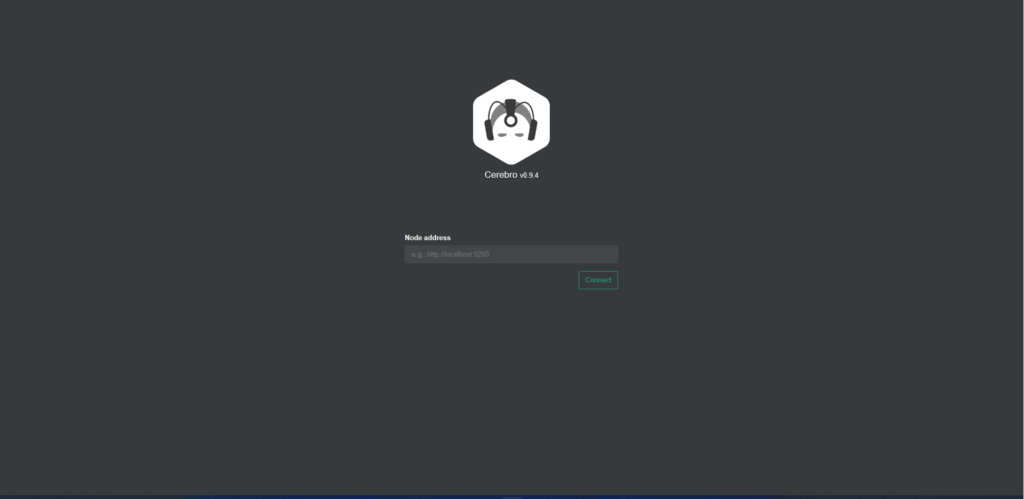
For those who are new to OpenSearch, Cerebro is a GUI that lets you inspect your running OpenSearch cluster.
The --name cerebro option explicitly names our container cerebro. This will prevent Docker randomly generating a container name for us. We’ll need to use and find this name later, so determinism is important here.
Once you see the output below, you’re up and running.
...Additional output...
[info] play.api.Play - Application started (Prod) (no global state)
[info] p.c.s.AkkaHttpServer - Listening for HTTP on /0.0.0.0:9000
To see the network of our new container we can use two different techniques.
Inspecting the Default Bridge Network for Containers
To view containers running in the default bridge network we can run:
docker network inspect bridge
This will produce a verbose output similar to the result below.
[
    {
        "Name": "bridge",
        "Created": "2022-07-17T15:03:26.2350354Z",
        "Scope": "local",
        "Driver": "bridge",
... settings ...
        "Containers": {
            "242eb59d8d69ced19f54eafcab671fccecaa38afe9978a1450f4e2e9a286ab10": {
                "Name": "cerebro",
                "EndpointID": "c56867becabf9defe69f8defc404ac620b93521749f6493e24bd686fa35f9492",
                "MacAddress": "02:42:ac:11:00:02",
                "IPv4Address": "172.17.0.2/16",
                "IPv6Address": ""
            }
        },
... settings ...
    }
]
If you scroll down you’ll find a section called Containers. Within this we can see our container named cerebro.
Inspecting a Container for its Joined Networks
We are also able to see what network our container has joined by inspecting it directly.
docker inspect cerebro
Look for a section called NetworkSettings towards the bottom of the long list of output. You’ll be able to observe the bridge network under the Networks section.
If you’re interested in learning how you can remove noise from the output of verbose commands such as inspect, come back to the article on Pretty Filtered Docker CLI Output after finishing this tutorial!
That was super easy! But why is this default bridge network undesirable?
- No automatic DNS resolution between containers. Unless you specify the legacy
--linkoption (which needs to be setup in both directions), you have to communicate between containers by using their IP Addresses - Isolation. All containers on the default bridge network are able to talk to each other via their IP Address and Port numbers. This communication may be intentional in some cases, but could provide unnecessary exposure (and risk) to your services in others
User Defined Bridge Networks
The alternative to communicating via the default bridge network is to use one or more user defined bridge networks. This Docker article compares and contrasts user defined bridge networks against the default.
Let’s explore the two ways that we can create a user defined bridge network.
Define a Bridge Network with the Docker CLI
This is the most straightforward way to create a network.
docker network create test-network
This command will create you a new bridge network called test-network. Let’s confirm that it was created:
docker network ls
NETWORK ID     NAME                        DRIVER    SCOPE
ca82fdd00d45   bridge                      bridge    local
14656eba8a51   test-network                bridge    local
Once a network is created it persists until it is explicitly torn down.
docker network rm test-network
You are able to run the docker network rm command, as above, if you would like to remove a network.
Define a Bridge Network with Docker Compose
If you’re working with multiple services it is easier to define the network alongside the other containerised infrastructure within a Docker Compose file.
In the Sloth Summary of the Connecting to Opensearch tutorial, we can see a network defined in the complete Docker File.
networks:
  opensearch-net:
Please note, from Docker documentation:
Your app’s network is given a name based on the “project name”, which is based on the name of the directory it lives in. You can override the project name with either the –project-name flag or the COMPOSE_PROJECT_NAME environment variable.
For example: if the folder that you ran your docker-compose file from was called OpenSearch, the network would be called opensearch_opensearch-net.
If you care to given an explicit name to your network, you can can also specify it as an option when defining the network itself:
networks:
  opensearch-net:
    name: custom-network-name
In this case, the network would be called custom-network-name without the parent project prefix.
Joining a Container to a Network
If you’re still running the cerebro container from before, we’ll need to kill it and remove it. This can be done by hovering over the container’s row in the Docker Dashboard and clicking the trash can icon.

Alternatively, you can run the following two commands:
docker container kill cerebro
docker container rm cerebro
For consistency with the Opensearch connectivity tutorial moving forward, this tutorial will be using the opensearch_opensearch-net network. Feel free to use your own name though, as it is just an identifier and has no bearing on functionality.
Now we’re ready to launch a Cerebro container on the user defined bridge network.
docker run -it --rm --name cerebro --net opensearch_opensearch-net lmenezes/cerebro
This command has a few new parameters. Let’s take a look:
- -it option. We are running Docker in the foreground via PowerShell (which is an interactive process). Therefore we can use the
-itflag. This allocates a tty (tele type) so that if we issue a SIGNTERM (with CTRL + C) the container will listen and shutdown - –rm option. This tells Docker to remove the container once it shuts down, so that we won’t have to keep clicking the trash can icon in the Docker Dashboard when we finish with the container
- –net option.
--net opensearch_opensearch-nettells Docker that we want to use a user-defined network calledopensearch_opensearch-net
You’ll now be able to see your container running in the network using either of the two inspection methods covered earlier in this tutorial.
Exposing Ports: the Container Entry Point
Looking at the output of the Cerebro console, you’ll see the message:
[info] play.api.Play - Application started (Prod) (no global state)<br>[info] p.c.s.AkkaHttpServer - Listening for HTTP on /0.0.0.0:9000
Once running, Cerebro tells us that it is listening on port 9000. However, you’ll notice a problem when you navigate to http://localhost:9000 in your web browser.

Currently Cerebro is running inside a container and listening on port 9000. However, no ports have been exposed on the container itself. This means that we can’t “get into” the container to reach Cerebro on that port.
If you’re new to the concept of network ports, think of them as doors in a house. Much like a door lets someone walk into a room, a network port let’s data into a piece of software.
When we talk about ports in the context of Docker however, rather than thinking of them as doors to a house, it’s easier to think of them as doors in an apartment building. The first door (port) is exposed by the Docker container. This let’s us into the apartment building. We then need to go through another door (port) to enter the apartment that Cerebro lives in (listens on). The apartment analogy allows us to extend our thinking in cases where multiple applications are running in a single Docker container; they each have their own apartment (port) in the building (container).
This is where we reach our final evolution of the cerebro Docker command line command
docker run -it --rm --name cerebro --net opensearch_opensearch-net -p 9000:9000 lmenezes/cerebro
The -p 9000:9000 option configures a Docker port mapping. The left hand value tells the Docker Host to listen on port 9000 on the local machine and map it to the right hand value, TCP port 9000 in the container itself. Using the same port value on both sides makes consuming the port a logically consistent experience.
Fun fact: the shorthand p value doesn’t stand for “port”, it stands for “publish”; speaking of publishing ports to the outside world.
Starting your Cerebro container again with ports published will now allow you to connect to the container.

You can easily observe the published ports of a container in the Docker Dashboard, or via the inspect command.

Cross Container Communication via User Defined Bridge Network and Exposed Ports
The concept of publishing ports is not only important for us loading the Cerebro UI “from the outside” of the container via localhost:9000. It’s also important for cross container connectivity. Without an exposed port, containers using a shared user defined bridge network would only know about the “apartment building” (container) but not the “apartment” (port) within the building to go to.
Unlike connecting to containers from the local machine, once we are within the container we need to target connections to other containers from the perspective of the container itself. We can’t use localhost:9200 from within the Cerebro container to connect to the OpenSearch container. This is because localhost would refer to the Cerebro container itself, and nothing is running on port 9200 within it.
Instead, we are able to connect to the OpenSearch container using the name of the container opensearch-node1. This is because both the Cerebro container and OpenSearch container share the same user defined bridge network and can refer to each other via the container name. With the default bridge network, we would need to refer to the OpenSearch container via its IP Address, which is much less user friendly.
This means that when we connect to OpenSearch from Cerebro’s container via a web browser on our local machine, we’d enter:
http://opensearch-node1:9200
This has two parts:
opensearch-node1is the container name on the shared user defined bridge network that is running opensearch- 9200 is the port that the OpenSearch container has exposed. This port then maps to port 9200 within the container, which OpenSearch is listening on
Two Ways of Connecting to Docker Containers
We have now covered two ways of connecting into Docker containers:
- Connecting into a Docker container from the local computer which is running the container. This is achieved by connecting to
localhostand the exposed port of the container - Connecting to a Docker container from within another Docker container. This is achieved by joining both containers to a shared user defined bridge network and connecting to the container name and exposed port of the container
In both of the cases above, the exposed port of the Docker container needs to map to a port within the container that the software is listening to. To keep things simple it is often easiest to map the containers exposed port as the same port that the software running within the container is listening to.
Sloth Summary
There we have it!
Docker Container Networking Tutorial Key Commands
docker network ls- List networks
docker network create <name>- Create new network
docker network rm <name>- Remove network
docker inspect network <name>- Inspect a network
docker inspect <containerName>- Inspect a container
docker container kill <name>- Kill a container
docker container rm <name>- Remove a container
Docker Networking Tutorial Cerebro Command Breakdown
docker run -it --rm --name cerebro --net opensearch_opensearch-net -p 9000:9000 lmenezes/cerebro
The command above means the following:
Docker rununder the hood is a combination ofdocker createanddocker start: creating a container and starting it immediately.- We are running Docker in the foreground via PowerShell (which is an interactive process). Therefore we need the
-itflag. This allocates a tty (tele type) so that if we issue a SIGNTERM (with CTRL + C) the container will listen and shutdown. --rmtells Docker to remove the container once it shuts down.--namegives a constant name to the container, otherwise Docker will give it a random name.--net opensearch_opensearch-nettells Docker that we want to use a user-defined network called opensearch_opensearch-net. This was defined in our Docker Compose file in the guide to running OpenSearch locally.-p 9000:9000publishes port 9000 on the container (so we can access it via http://localhost:9000), and maps it to port 9000 inside the container.lmenezes/cerebrothis is the image name that we will be running from Docker Hub.

