

Visual Studio Docker Debugging is simple in .Net. This is despite Docker Visual Studio orchestration actually being complex under the hood. This tutorial will cover debugging a .Net application running in a Docker container with Visual Studio and dive deep into how Microsoft makes this possible.
This article covers topics of previous blog posts and is loaded with information. It is recommended that you explore the following pre-requisite tutorials before getting started:
The Visual Studio Docker File: Only Part of the Story
Writing a Dockerfile by hand can be a time consuming and confusing process based on your level of experience. This is true even before we start thinking about how we can bring the debugging power of Visual Studio into the mix.
Luckily for us, Visual Studio can generate a base Dockerfile as a starting point. A wise Code Sloth will use an Integrated Development Environment to its fullest after all!
This Dockerfile is only described as a starting point however, as your local debugging experience will not fully utilise it. This is because Visual Studio Remote Debugging tools must be available alongside our application at runtime and coordinating this in Docker introduces more than a little complexity to the workflow.
In this tutorial we’ll explore the entire default Dockerfile that is generated by Visual Studio. After this we will inspect how it is used by Visual Studio to enable remote debugging of conatinerised applications; an abstraction that will truly make you appreciate the IDE.
Generating a Dockerfile in .Net Core
Let’s start by generating the default Dockerfile from Visual Studio.
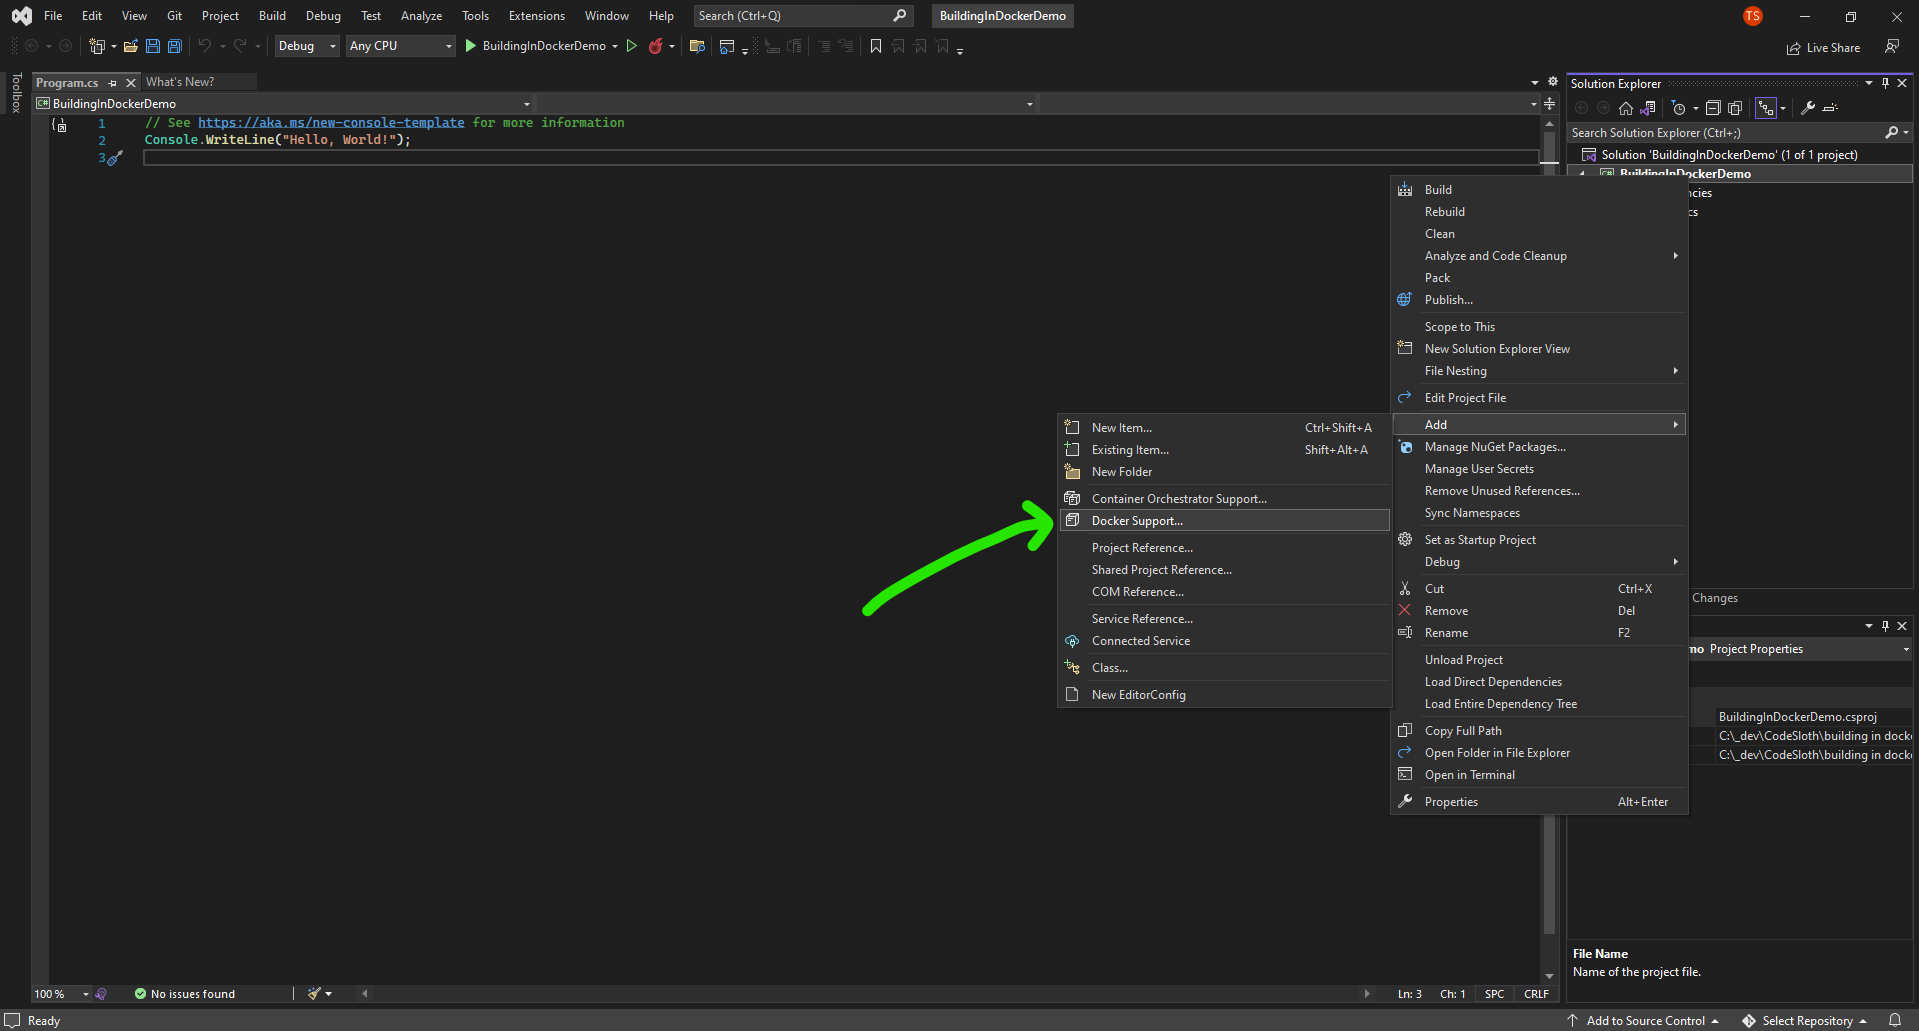
Right click your project, select Add -> Docker Support.
A dialog box will pop up.

Select Linux
After clicking OK two things will happen:
- A launch settings json file will be added to the project’s properties. This will provide a new option next to the play (debug/F5) button which will allow us to debug our application from inside a Docker container
- A dockerfile will be generated in the same folder as the .csproj

Exploring the Visual Studio Dockerfile
The default Dockerfile will look something like this:
See https://aka.ms/containerfastmode to understand how Visual Studio uses this Dockerfile to build your images for faster debugging.

FROM mcr.microsoft.com/dotnet/runtime:6.0 AS base
WORKDIR /app

FROM mcr.microsoft.com/dotnet/sdk:6.0 AS build
WORKDIR /src
COPY ["BuildingInDockerDemo/BuildingInDockerDemo.csproj", "BuildingInDockerDemo/"]
RUN dotnet restore "BuildingInDockerDemo/BuildingInDockerDemo.csproj"
COPY . .
WORKDIR "/src/BuildingInDockerDemo"
RUN dotnet build "BuildingInDockerDemo.csproj" -c Release -o /app/build

FROM build AS publish
RUN dotnet publish "BuildingInDockerDemo.csproj" -c Release -o /app/publish /p:UseAppHost=false

FROM base AS final
WORKDIR /app
COPY --from=publish /app/publish .
ENTRYPOINT ["dotnet", "BuildingInDockerDemo.dll"]
Let’s explore each of the steps in this multi-stage build.
Visual Studio Docker File Base Stage
FROM mcr.microsoft.com/dotnet/runtime:6.0 AS base
WORKDIR /app
The first stage is called base, which:
- Pulls the .Net 6 runtime image from docker hub
- Creates a directory in the root of the container called app
Visual Studio Docker File Build Stage
FROM mcr.microsoft.com/dotnet/sdk:6.0 AS build
WORKDIR /src
COPY ["BuildingInDockerDemo/BuildingInDockerDemo.csproj", "BuildingInDockerDemo/"]
RUN dotnet restore "BuildingInDockerDemo/BuildingInDockerDemo.csproj"
COPY . .
WORKDIR "/src/BuildingInDockerDemo"
RUN dotnet build "BuildingInDockerDemo.csproj" -c Release -o /app/build
The second stage is called build, which:
- Is based off the .Net 6 SDK, also pulled from docker hub
- Creates a directory in the base of the container called
src - Copies the
.csprojfrom the local computer into a subfolder of the same name in the working directory - Runs
dotnet restoreon the project to fetch required nuget packages - Copies everything from the .sln folder of the local machine into the working directory of the container with
COPY . .- This overrides the files that were previously copied
- Source files are now available alongside the solution and project files in preparation for building
- The working directory is set to the folder containing the project file
- This allows
dotnet buildto build the project in release mode and copy the results to the root of the container into a folder calledapp/build
- This allows
It might seem a bit strange that we only copy the project file into the container before doing a dotnet restore. However on closer inspection we can see that this is a Dockerfile optimisation to leverage the caching of Docker layers.
As we have covered in the prerequisite article, a new Docker layer is created whenever the file system is modified. Both the copy operation and dotnet restore produce their own layers for this reason.
This means that we only need to make one expensive trip to the internet to fetch Nuget pacakges during dotnet restore. Each subsequent Docker build will use the cached layer, up until the project file is updated to include revisions to Nuget package dependencies.
Sloth Side Quest
The copy command containing a relative path to our local machine’s filesystem implies that we need to build the dockerfile in a certain way. We must:
- Run the docker build command from the folder containing the solution file
- Use the -f command to tell Docker where the Dockerfile is, such as
-f .\BuildingInDockerDemo\or-f .\BuildingInDockerDemo\Dockerfile- This is because the Dockerfile sits alongside the project file by default, which is one level deeper than the solution file
- Capture the current context from the of the solution’s folder using
.
Here’s an example of how this can be done, noting that C:\_dev\CodeSloth\building in docker is the path to a folder that contains my solution file.
PS C:\_dev\CodeSloth\building in docker\BuildingInDockerDemo> docker build -t test -f .\BuildingInDockerDemo\Dockerfile .
Visual Studio Docker File Publish Stage
FROM build AS publish<br>RUN dotnet publish "BuildingInDockerDemo.csproj" -c Release -o /app/publish /p:UseAppHost=false
The publish stage runs dotnet publish to prepare the application for deployment; ensuring that third party dependencies are copied into the bin folder. It is argued that the prior dotnet build command is actually redundant, because the publish command will also build the target project.
Given that the final step leverages the publish stage and not the build stage, what else could it be used for?
Visual Studio Docker File Final Stage
FROM base AS final
WORKDIR /app
COPY --from=publish /app/publish .
ENTRYPOINT ["dotnet", "BuildingInDockerDemo.dll"]
The final build stage is called final, which:
- Leverages the first build stage called base, which is effectively the .Net 6 runtime with a folder called app defined in the root of the container
- Sets the working directory to a folder called app in the root of the container
- Copies the publish output from the publish folder in the publish build stage into the app folder in the root of the container
- Sets the entrypoint
Setting any entry point tells Docker to configure the container as an executable and to run the command that appears as the first argument in the string array. In this case it will produce the command dotnet BuildingInDockerDemo.dll which will be able to launch our dll as an exe.
Running the Visual Studio Docker File
If Visual Studio has the project name in the dropdown next to the filled green play button, click the caret and select the Docker option. Then pres F5 or click the play button.
Open the build window and observe what is printed. Two separate commands will be run. Let’s take a closer look.
1>docker build
-f "C:\_dev\CodeSloth\building in docker\BuildingInDockerDemo\BuildingInDockerDemo\Dockerfile"
--force-rm
-t buildingindockerdemo:dev
--target base
--label "com.microsoft.created-by=visual-studio"
--label "com.microsoft.visual-studio.project-name=BuildingInDockerDemo" "C:\_dev\CodeSloth\building in docker\BuildingInDockerDemo"
This first step simply builds the base stage of the dockerfile (--target base) and tags it as a development version (-t buildingindockerdemo:dev).
The second step is much more involved, however. It has been split into separate lines below
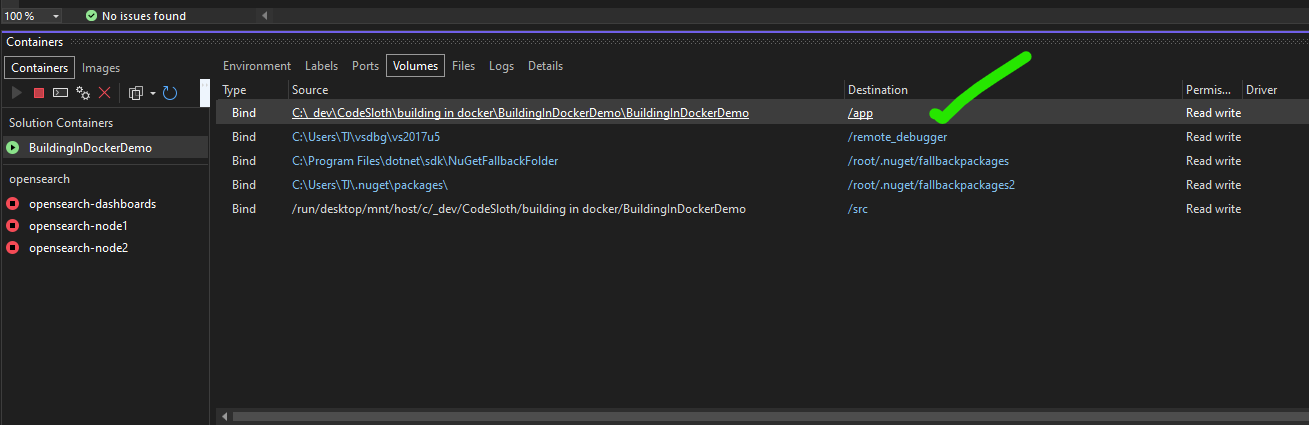
1>docker run
-dt
-v "C:\Users\TJ\vsdbg\vs2017u5:/remote_debugger:rw"
-v "C:\_dev\CodeSloth\building in docker\BuildingInDockerDemo\BuildingInDockerDemo:/app"
-v "C:\_dev\CodeSloth\building in docker\BuildingInDockerDemo:/src/"
-v "C:\Users\TJ\.nuget\packages\:/root/.nuget/fallbackpackages2"
-v "C:\Program Files\dotnet\sdk\NuGetFallbackFolder:/root/.nuget/fallbackpackages"
-e "DOTNET_USE_POLLING_FILE_WATCHER=1"
-e "NUGET_PACKAGES=/root/.nuget/fallbackpackages2"
-e "NUGET_FALLBACK_PACKAGES=/root/.nuget/fallbackpackages;/root/.nuget/fallbackpackages2"
--name BuildingInDockerDemo
--entrypoint tail buildingindockerdemo:dev -f /dev/null
Let’s explore each of these commands:
-dt runs the container in the background and allocates a psuedo teletype. This supports keeping the container alive even if it has just run a short-lived process
-v “C:\Users\TJ\vsdbg\vs2017u5:/remote_debugger:rw” mounts a volume containing the visual studio remote debugging tools from the local disk onto the container called remote_debugger
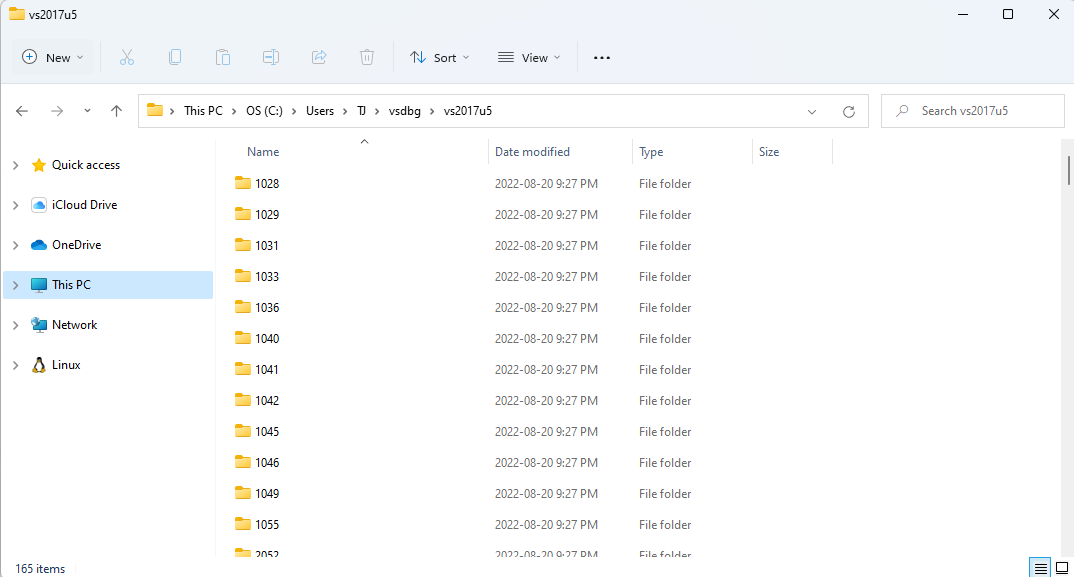
This can be seen on the local disk
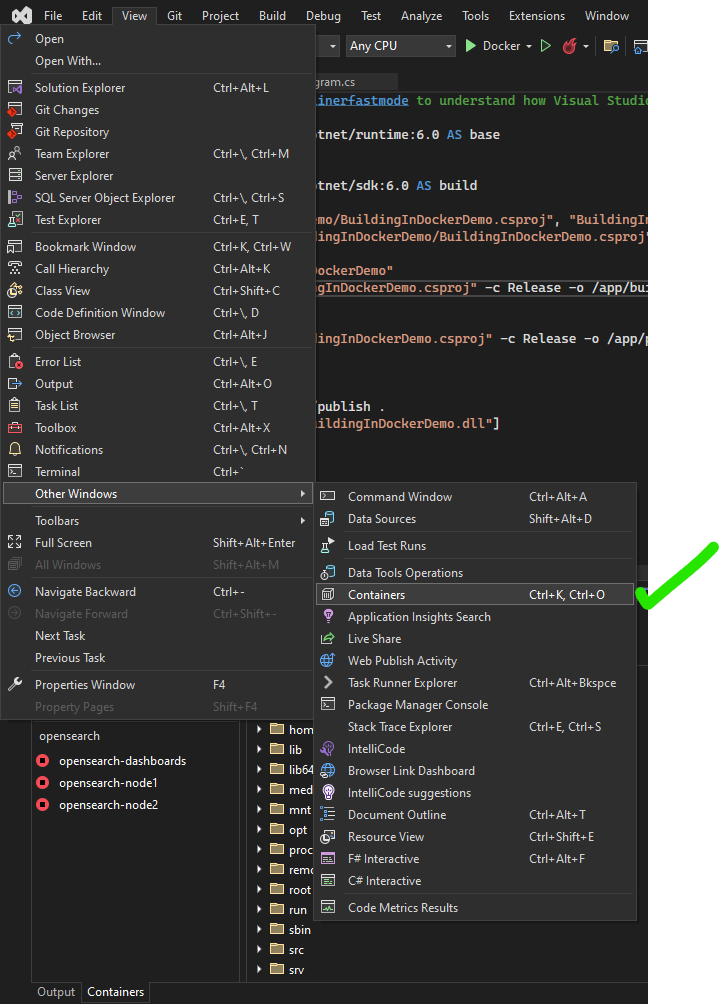
It can also be seen in Visual Studio by clicking the view menu -> other windows -> containers and then selecting the container
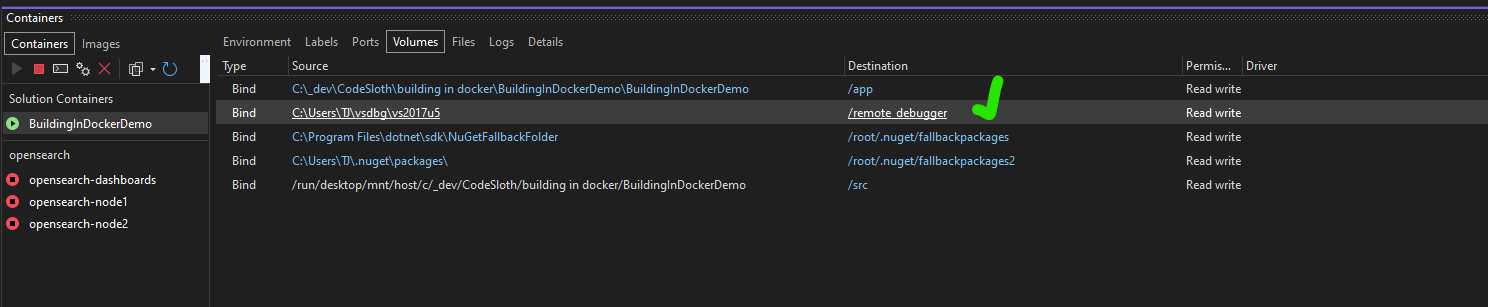
The volumes menu will show the mounted volume and its permissions
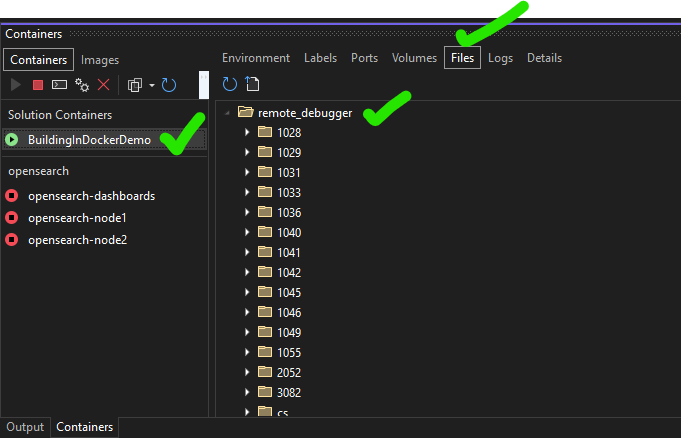
The files menu will let you observe the actual files. Click on the destination link to be taken to remote_debugger
-v “C:_dev\CodeSloth\building in docker\BuildingInDockerDemo\BuildingInDockerDemo:/app” mounts another volume from the folder containing the csproj file onto the container called app.
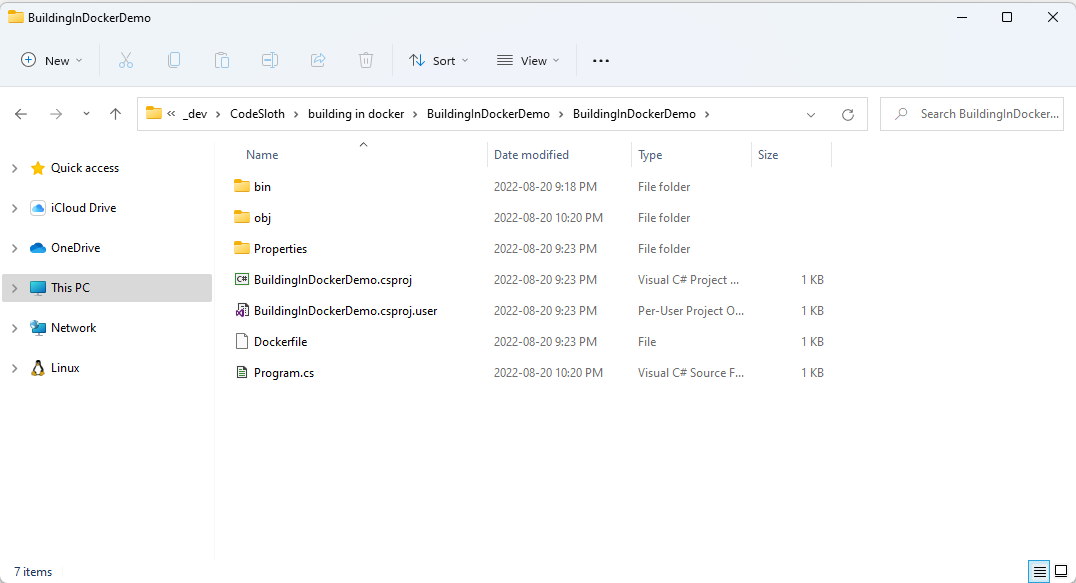
This can be seen on the local filesystem
Once again we can view the volume in the container
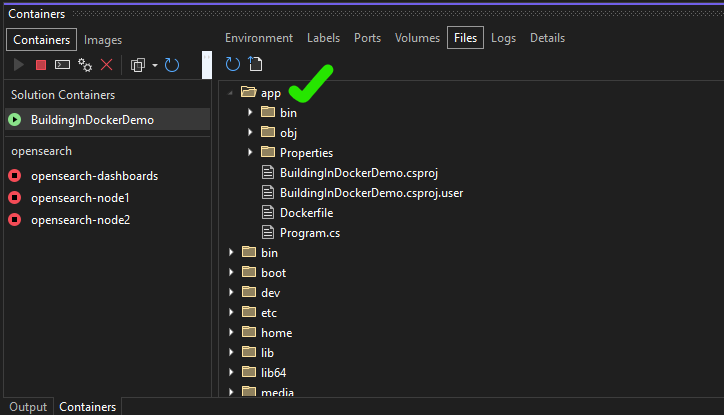
And once again in the files on the container
-v “C:_dev\CodeSloth\building in docker\BuildingInDockerDemo:/src/” mounts another volume from the folder containing the solution file onto the container called src. Note: this also contains the folder and contents of the prior step (it is a superset of the prior steps files). The availability of source files let’s the remote debugger do its thing.

We can view this from the local disk
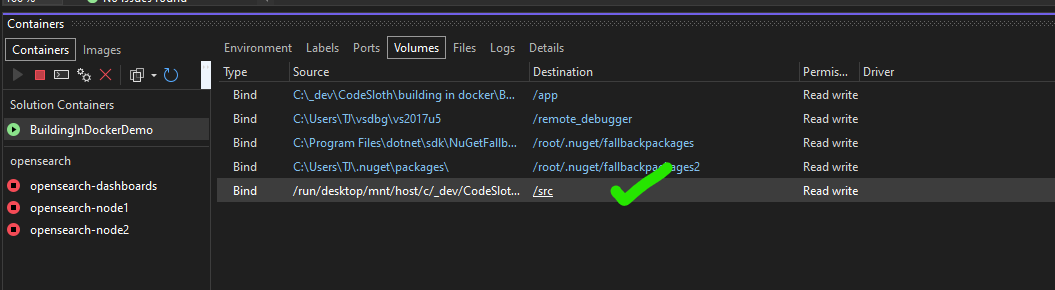
And once again see the volume in the container
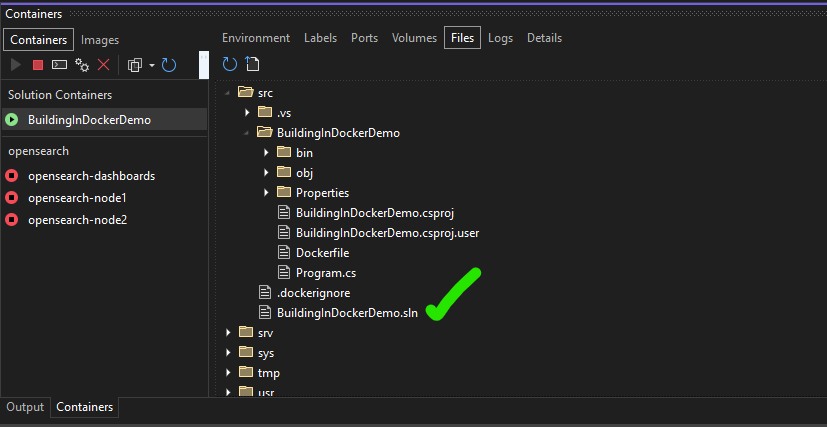
Finally we can see the files in the container:
-v “C:\Users\TJ.nuget\packages:/root/.nuget/fallbackpackages2” Mounts the nuget packages cache from the local machine to a volume on the container called fallbackpackages2.
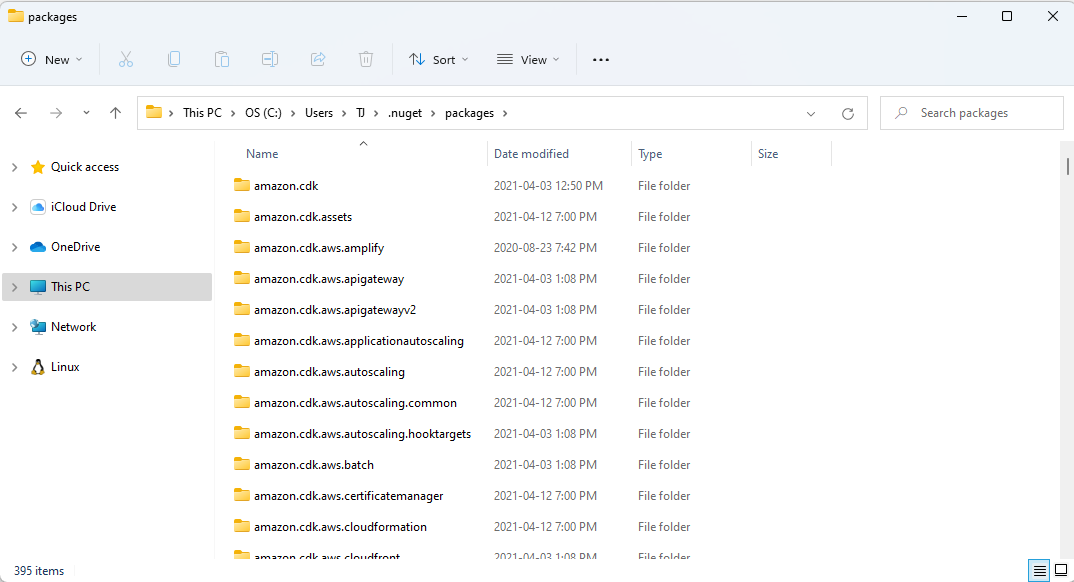
This can be seen on the local disk
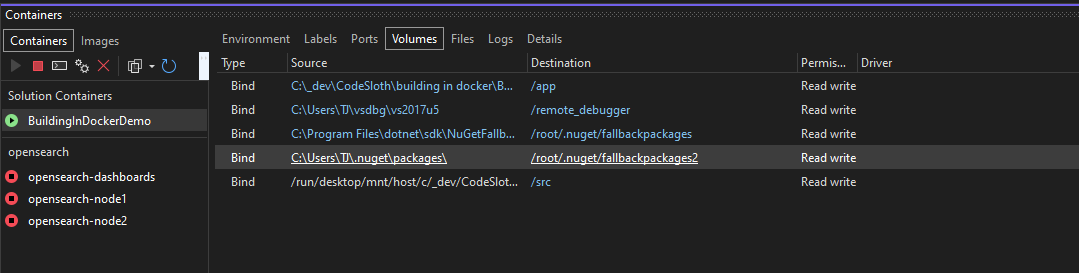
As a volume mounted on the container

And on the file system in the container
-v “C:\Program Files\dotnet\sdk\NuGetFallbackFolder:/root/.nuget/fallbackpackages” Copies another fallback folder of nuget packages.
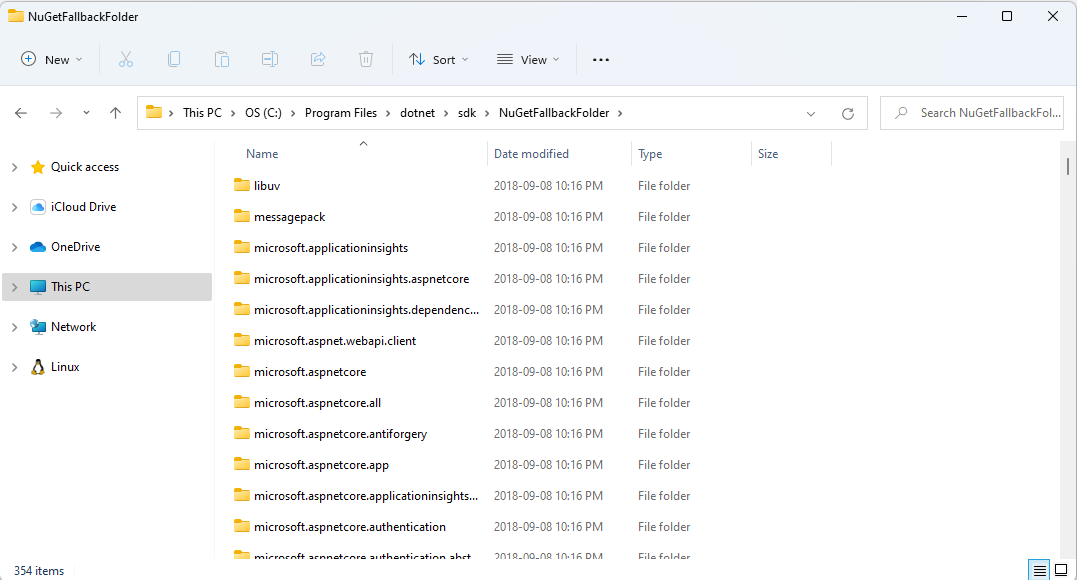
This can be seen on the local disk
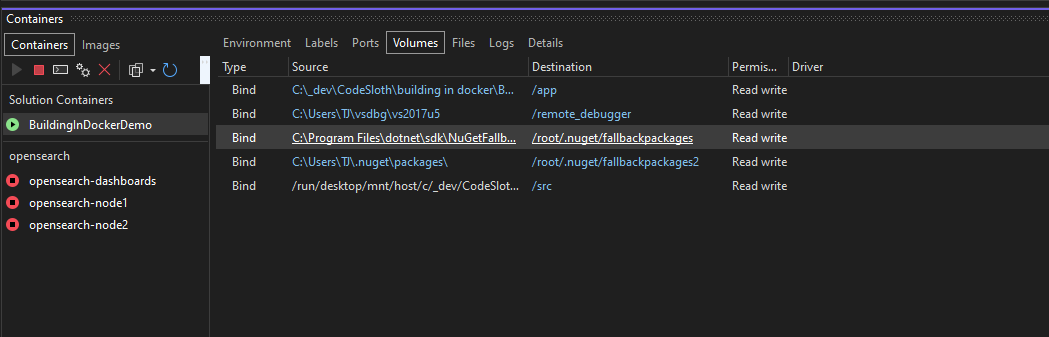
As a volume mounted in the container
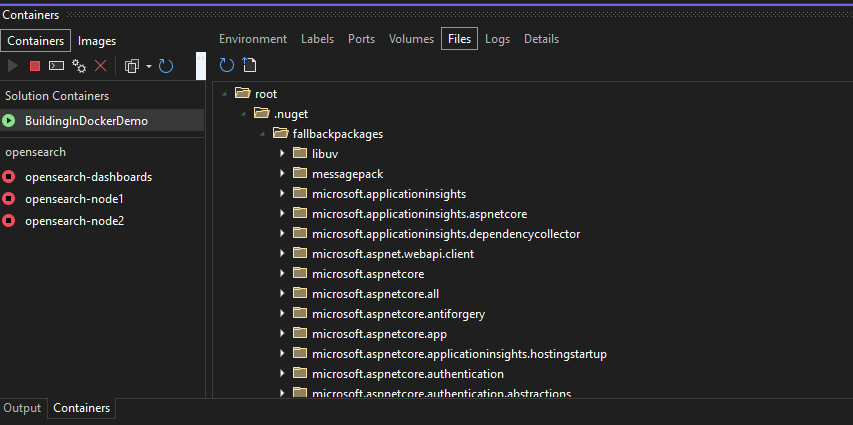
And on the filesystem of the container
-e “DOTNET_USE_POLLING_FILE_WATCHER=1” sets an environment variable on the container that signals to .Net to actively poll the file system for changes.
-e “NUGET_FALLBACK_PACKAGES=/root/.nuget/fallbackpackages;/root/.nuget/fallbackpackages2” sets two environment variables relating to where to find nuget packages.
–name BuildingInDockerDemo Names the container after the solution
–entrypoint tail buildingindockerdemo:dev -f /dev/null Sets the entry point to be the dev tagged version of the image that was built.
- Using
-f /dev/nullprevents the detached container from shutting down, because the tail utility in linux writes to standard output and sending it to /dev/null leverages a special device that discards output.
Sloth Summary
That was a lot of information! But what does it all mean?
Firstly, a lot of things are orchestrated to allow us to use the Visual Studio remote debugging tools in a container:
- The remote debugging tools themselves
- The compiled app
- The raw source code
- Multiple sets of Nuget packages
- Multiple sets of environment variables
- Container level configuration to support the indefinite execution of a detached container
As is covered in this Microsoft article, Visual Studio actually builds your projects locally and then mounts the folder of the compiled app to a volume against the Docker container; a process called Fast mode build. This means that we only leverage the first stage of the Dockerfile when building the container. Effectively, the base stage is just a means of provisioning a container that has the .Net 6 runtime installed on it.
Ultimately though, all of the complexity that we have just covered is abstracted away from us wonderfully by Visual Studio. This means that your actual developer workflow very closely mimics local debugging in Windows, so that you can get back to engineering awesome Sloth Code!
Keep an eye out for upcoming articles on Debugging .Net Core applications in Docker, where we’ll create a Dockerfile that work with as multi-project solution, web API and even Docker Compose!